


DIY: Chalkboard with Rustoleum. {Review}
09:44

I'll start off by saying the wood that I used is wood left over from other projects, I thought I would put that to good use! I'm all for up-cycling and recycling.


While I was waiting for that to dry, I opened the magnetic chalkboard paint and gave that a good stir. It was quite watery on top and thick at the bottom, I stirred the chalkboard paint for around 8-10 minutes, making sure that it was a thicker, even consistency, I also left it to settle for a few minutes. The paint is very black and nice and was nice and smooth after it had been stirred well.
The magnetic chalkboard paint can be used on many surfaces such as wood, metal, plaster and much more. It is for interior use only.

Once the first coat was dry (it took about 45 minutes to dry outside), I added a second coat and noticed that the paint was going on a lot smoother and was starting to really look like a chalkboard!

After the second coat it still looked a little patchy and so I went ahead with a third coat. Again it didn't take very long to dry and the paint went on very smoothly and it honestly didn't take very long to paint at all! Three coats is recommended and my board certainly needed three coats.
 |
| Chalkboard after the third coat. |
I did give the pine edging a quick wipe down just to remove any dust/lose bits. Again, I used a paint brush to apply the paint onto the edging strips. The paint itself is a really good consistency, neither to thick nor too thin. It is actually quite a "chalky" paint, too. The good thing I really like about this paint is, it can be applied to wood without any preparation or sanding.


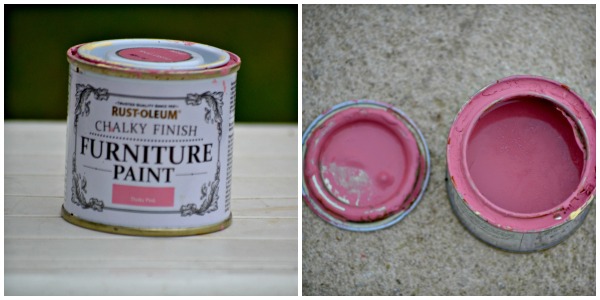
Once that was completely dry, I attached the edges to the chalkboard using small tacs (you can use a strong wood glue or screws) and I painted over them with the pink chalky paint. Once that was completely dry (It took around 2 hours to completely dry) I applied the finishing wax using an old cloth. I wiped the finishing wax into the painted frame and worked it in by rubbing up and down quite firmly. The finishing wax protects the frame and also gives it a lovely smooth finish. I left that to dry for about half an hour and then went over it with a soft cloth, almost buffing it. The frame was then left with a nice sheen finish. I then left it for a further fifteen minutes to dry fully.
 |
| A sheen finish! |


I tried normal chalkboard chalk and chalk pens on the chalkboard, both work wonderfully. The chalkboard washes perfectly with soapy water. That's it my chalkboard is complete! Not bad for a first attempt, huh? Especially because I already had the wood and I do like to recycle! I am really quite proud of my chalkboard (and myself!). I know that my daughter will enjoy playing schools with this chalkboard and it also makes a good "reminder" board for myself, hehe.
I can't recommend using Rustoleum paint enough, honestly, it is really good quality, great coverage and leaves a lovely finish, too!
I feel very inspired to try other DIY projects now. I might give up cycling a piece of furniture a go next.... Watch this space.
Also check out Rustoleum's youtube channel for more great ideas, inspiration and tips!
Have you attempted any DIY projects lately? Let me know in the comments.
Sarah xXx


I was sent samples of the paints and finishing wax for the purpose of this post. All opinions and words are my own, honest, personal opinions. I was not paid for this post.


38 comments
Ooh, clever! When I have my dream (rustic as opposed to plastic) kitchen, I want to make a cupboard door into a blackboard :)
ReplyDelete#twinklytuesday
www.mumzilla.co.uk
Well done! That looks fantastic...
ReplyDeleteLove this, I've been going to do something similar, seeing yours has inspired me on. please come and link up with #Trash2Treasure my monthly upcycling linky, it is perfect. Stopping by today from #TriedTested
ReplyDeleteI generally dread reading DIY posts, not because I don't like them, but because I inevitably end up wanting to do whatever project the post is about. The chalkboard is one that I've been wanting to do for awhile and you've made it seem very possible to do! Thank you!!
ReplyDelete#abitofeverything
It looks so easy to make and it's a fab idea, very clever. I might make a chalkboard for the kitchen, to make a list of the groceries I need.
ReplyDeleteChalkboards are amazing. We made both of my friends kids their own toy boxes and made chalk boards on the side of them much like this, they get so much fun out of them! x
ReplyDeleteI've got the pain upstairs! it really smells doesn't it.. such a stronge smell. It's great for kids boxes and if you just want a cheaper way of doing chalkboards!
ReplyDeleteaw wow this is amazing I need to get some and make some chalk boards i could do with a large one in the kitchen for keeping all my shopping lists on
ReplyDeleteI love chalkboards they are a great platform for both fun and educational learning. I have never thought about making a chalkboard before.
ReplyDeleteI honestly didn't know this is how it was done!
ReplyDeletePopping back over, I do love the way you have writen the what's needed things on your board, just to prove how perfectly it works! So pleased you could join me for #Trash2Treasure
ReplyDeleteThis is fab, we'll done. I still have the black board paint in the cupboard just waiting to be used....
ReplyDeleteI love chalkboards but have never actually made one myself. well done
ReplyDeleteFab tutorial! I've made a few chalkboards myself in the past and I love the retro feel of them
ReplyDeleteYou've made this look so easy to do! I have a wall which I want to make into a chalkboard but because it's so big I saw it as a daunting task, esp if it didn't work. I think now I might give it a go!
ReplyDelete#TriedTested
Oh wow this is a lovely DIY! I want to make one.
ReplyDeleteEmily from http://emilyunderworld.co.uk
Cool stuff! I love DIY projects and I guess, I need to check this out. ;)
ReplyDeleteWhat a super art project! I used to have the front of a wardrobe in my children's room covered in blackboard paint. Such a fun medium to play with. :)
ReplyDeleteThis looks great. I am no good at anything DIY so I admire those who are.
ReplyDeleteThis is great. I'd love to make one for my kitchen #MMWBH
ReplyDeletegreat diy, always meaning to make one for my daughter and have chalkboard paint waiting to be used
ReplyDeleteSuch a simple yet effective idea - will have to have a go at this, thank you :) #MMWBH
ReplyDeleteHelen x
http://treasureeverymoment01.blogspot.co.uk/
I've been wanting to get a chalkboard for our kitchen but can't seem to find any I like, but now I won't be buying one, I'm definitely going to be giving this a try! Love the pink edging too :) #abitofeverything
ReplyDeleteYou make this look so easy! I could definitely make this from some spare bits and bobs I've got lying around in the garage seeing as I really want a chalkboard anyway!
ReplyDeleteOoh, I've been meaning to make one of these forever. This is a great DIY and looks very easy to follow. The pink edging is really cute :) x
ReplyDeleteThis is such a great idea - I love the paint. I have seen similar on a wall which I would love to try. Kaz x
ReplyDeleteOh wow, this looks so good!
ReplyDeleteIt really has inspired me to buy my own chalkboard paint and get creative :)
X
Great job! What a good and useful project!
ReplyDeleteFantastic project and the final result looks amazing!
ReplyDeleteAmazing! I love this. I want to make one for Hayden's room.
ReplyDeleteHe'll love it.
Thanks for sharing hun
Charlotte x
Wow this looks brilliant! Job well done.
ReplyDelete#TriedTested
That looks great. So simple. I always think I'll make one but never get round to it. #sharewithme
ReplyDeleteThanks for sharing your review on #TriedTested this week x
ReplyDeleteWe used Rustoleoum to paint the inside of our playhouse last year. The little monsters love it! :)
ReplyDeleteGreat job Sarah, I love crafting and up-cycling :) Looking forward to see your next projects..
ReplyDeleteThanks for sharing at Creative Mondays blog hop
Ahhh look at you go.. I love this. Chalkboards are hours of entertainment. This looks so great with the pink frame around it. Thanks for linking up to Share With Me #sharewithme
ReplyDeleteVery cute chalkboard. I worked with this brand last year and really loved the products! Thanks so much for linking up with #MMWBH
ReplyDeleteGreat job! I love this project. I like my chalkboard paint but I would like MAGNETIC chalkboard paint much more. That is amazing! #MakingHome
ReplyDeleteThank you so much for taking the time out to visit my blog and comment, I truly appreciate it. (Please do not leave URLs/links in the comments, thank you!)